Showing posts with label tutorial. Show all posts

Saturday, August 28

DIY Knock Off Jewelry

Okay, so about a month (maybe two) ago, I was thumbing through a Rachael Ray magazine. She has a few pages in there with pictures of her faves. I love looking at them and getting inspiration for my own wardrobe and life, however, I can rarely afford them and/or the prices shock me and I think I could make that myself!
So, like I said, i was thumbing through and I came across this cute necklace called The Trinity. But it's $128 for three pearls on a leather strap and I think to myself: I could absolutely make that myself!!! And I go to the website listed in the magazine. Allison Craft Designs

I found out that she actually has a lot of her stuff in shops on the beach about 30 minutes from here. So, just looking at these beautiful pieces made me want my own, but not at those prices! Are you kidding me? So, that's what I did. I made my own. I didn't even go to the store for this one. I had everything on hand. (Yes, I'm a craft hoarder.) I didn't use leather because it comes in short supply here locally. I used hemp instead. What do you think?

These are just the photos of a few of the creations that were spawned from viewing her website. The necklace isn't for sale on line, but it is in the slide-show at the top of the page. I made the trinity and the strands, but I haven't taken any photos of them yet. I think I'm going to make some more in different colors. I had a ton of these green bead leftover from a previous project and so I picked them for my experiment. Really all this jewelry boils down to is knots, leather or in this case hemp, and beads or pearls...


blog

Thursday, June 24

Beach Party

Last night I put together a party for one of my girls. She told her mom that she wanted a beach themed party and so, that's what I did for her. I forgot my camera and I had to use my phone to take some pictures of the decor. I made some pom poms, like these, that I hung from the ceiling. I used this cupcake template to create the cupcake liners. And then I made the umbrellas that I was inspired to make after seeing this fabulous spread. The center piece uses mini pom poms and larger umbrellas.


blog

Thursday, June 10

Spa Night!

For our Young Women’s activity last night we had a Spa Night. It was super fun! We invited the Relief Society sisters for manicures and pedicures and goodies. (As a way to transition the Young Women to Relief Society, we have joined forces and are planning joint activities with the Relief Society once a quarter. Last night was the first.) It was so fun!

We had a station set up for pedicures...


And we had a station set up for manicures...


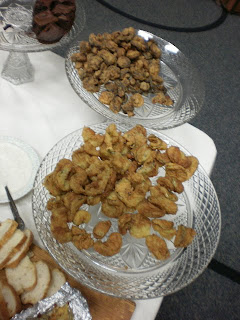
We had amazing food (scratch brownies, fried pickles and mushrooms, tuna salad, artichoke and crab dip with crustinies, cucumber sandwiches, and raspberry punch)


And we even had a make and take table where everyone could take home some Mexican Chocolate Body Scrub and Coconut Vanilla Brown Sugar Body Buff.


I had fun decorating and the best part was that it cost me only $4 for the whole room! I was inspired by this tutorial to make all the white tissue paper flowers. And then I used this tutorial and some paper bags we had in the closet to create the brown flowers. My 2 in. punch isn’t scalloped, but I think it still turned out super cute! I added an extra circle that I punched out to create the leaves by just twisting the center of the circle. For the chairs, I raided our Relief Society closet and got 6 table cloths, draped them over the chairs and tied raffia and tulle in a knot around the chairs. The food table center piece is filled with sea shells that my kids have collected when we go to the beach. The cost was less than $25 for the whole night!


blog


Girl's Camp- Project Secret Sister

Last Wednesday, at young women's, we made all the secret sister gifts for the girls for the whole week of camp and it was super fun! Thanks to all my virtual friends, it was easy to put together these ideas and to pull it off in one night. (BTW: Secret Sisters are something fun that creates unity and a bit of happiness in life and especially during camp. Each girl gets assigned another girl at camp. You know who you have, but not who has you. Then each day you give your sister a gift in secret. At the end of the week you find out you had you and you share who you had.)

At camp, we will be there from Tuesday to Friday and we have 5 girls going. In years past it has always been that the girls came up with their own, but this year we have a whole bunch of brand new beehives coming and they wanted to do it all together.

So this is what we decided to create:

Journals and pens: For the journals, I chose 4 images of animals (owl, flamingo, giraffe, and bear). Using Photoshop, I changed the images to black and white and then increased the contrast and brightness until it was just the black outline of the image and save them and printed them on colored card stock so that I could get 2 journals out of 1 sheet of letter sized paper. I cut them apart and fold them in half. for the paper on the inside, I did the same thing and used a hole punch to punch two holes in the top of the cover and pages and tide them with a ribbon. The girls did the punching and the tying and then stamped whatever words they wanted on the front. For the pens, we unscrewed the end and took it apart and cut a small piece of scrapbook paper, rolled it and put it in the pen tube, put it all back together and those were done.


Bracelets: For the bracelets, we used memory wire, which you can get at the bead section at any craft store or at wal-mart. Just curl one end of a piece (I cut the wire to get 3 out of 1 pkg.) of wire and string on your beads and curl the other end. And your done!

Flower Hair-bows: Flower hair pieces are hugely popular right now and I love them! We made ours by following this tutorial and sewed the flower to a hair band--I found hair bands at the Dollar Tree for 29/$1, plus they had all the flowers, too! Which makes this super cheap! Instead of hot gluing, we sewed the beads on to the petals.


Coconut Vanilla Brown Sugar Body Scrub: I have this book and I have used it many times. It has the recipe that I used for this. If you love cookie batter, you'll love the smell of this stuff! I made a double batch and put a couple tablespoons in baby food jars that I had been saving for this. I then made my own labels for them and we hade the girls use packing tape to put the labels on and make them sort of water proof. For the lid we punched out a 2in circle of matching scrapbook paper and hot glued it to the top then wrapped the edge with some ribbon and put a dot a glue at the back. I think they turned out super cute!

And now the girls have gifts for their secret sisters for another year! YEAH!
blog

Tuesday, July 28

Diaper Bags...

I really believe that most of them are completely in adequate for me or any breastfeeding mother. Most of them look like a baby quilt. All of them have pockets for baby bottles. All of them are bulky and awkward if they are roomy enough to hold anything that you'll actually need in a day of running errands with a baby in tow. All in all, I've always been a bit disappointed in them. Especially if I am in a crowded space. I'm always worried I'm going to whack someone with it. So, all this discontent lead me on a search for the perfect bag. Something that didn't look like a diaper bag, had oodles of pockets for baby and me while still being sleek enough not to take out the whole east coast should I choose to turn around. Well, my friends, I found it. I've been hunting for 4 months now in every purse/bag department I've been near. And yesterday I found it at Cato while we were waiting for the doctor's office to reopen after lunch. It has 3 separate compartments each with it's own zippers and pockets. So, 1 for diapers and wipes in their new container (we'll talk more about this soon), 1 for a blanket, burp rags and gripe water, and then 1 for Mama- complete with cell phone and wallet pockets and a zipper for the keys. I'm loving it! I used it today to take the fam to story time at the library and then to run a few more errands around town. For once I didn't hold my breath while I picked up my bag and turned around a few times to make sure we had everything before we left. But, to top it off, I found some yummy colored purple vinyl to myself a Poopy Clutch. Take a look!

I found the vinyl at Walmart for $3.77/yd. And one yard looks like I'll be able to squeeze out 6 of these clutches. So, guess what is going to be on my baby gifting list from now on? And since it's the no-sew version it only took me about 5 minutes to make. I did make a change from the directions though. I used a large snap for the closure instead of the button she uses.

Randall thinks it's a bit unnecessary but I adore it. Go on now, you know you want to make one...